
Monday, November 29, 2010
Thanksgiving 2010 Garner State Park, Texas
Garner State Park Photo Album. AWESOME, AWESOME AWESOME!!!
Sunday, November 14, 2010
Cargo Solutions Versions 1 & 2
Moby is a CrewMax Tundra. The cab is great for allowing me, the wife and the two kids lots of room to stretch out and relax when driving distances. Unfortunately all this cab space comes at the expense of bed space. At almost 67" square, there is not a lot of room to begin with in the bed. Throw in a tool chest that is around 20" deep, and bed space starts disappearing rapidly.

Having previously installed the Yakima crossbars to Moby's roof, it seemed the simple solution would be to go with a basket on top. So the search began for a suitable gear basket.
We have a 2005 Pathfinder that can be seen elsewhere in this blog. On the top of the Pathfinder we have outfitted a Yakima Load Warrior basket with the extension. This has been a good product. My friend Chris had a Yakima Mega Warrior basket with the extension also that he was willing to sell. We exchanged money and basket and mounted the basket.

I ran this setup for a few months but, I did not like the inaccessible location of the basket way up on the roof. It worked fine for storage of camping gear, and left the bed open for other items like bikes and such

but getting all the items up and down required a display of gymnastics and balance beam acts on the bed rails and various other parts of Moby that made me feel like I was pushing my luck a little too much. It became obvious after the trip pictured above that this setup would not last.
Now this moment caused a major rethink for me. I had always planned on doing something similar to the Expedition One's Tundra that has a bed rack not quite in line with the roof and mounting a basket or possibly a roof top tent on top. My experience with the basket over the cab showed that items placed that high would not really be feasible for most of the camping situations I encounter. I decided that placement almost directly above the bed rails would really work best in my situation.
To facilitate this, I purchased some Yakima bases, towers and crossbars to mount to the bed.

With the help of my son Quinn, we took the extension out of the Mega Warrior basket. The basket measured 74" long with the extension and hung way over the tailgate.

We mounted the towers and crossbars to the bed of the truck using stainless steel hardware and mounted the basket on to the crossbars. We managed to finish this up right before our World of Webelos campout in Sealy, Texas. We got everything loaded up and I have to say, this is the best setup in the world (for me). You can load the basket, cover it with a tarp, and strap everything down easily. Once the basket is loaded you've got the bed left for the heavier bigger items. You can just see in some of the pics, but mounted outboard of the basket on the crossbars are two bike carriers. I mounted these because the basket sits too low to allow bed placement of bicycles. Contact me if any questions, be happy to get more specific if requested. Thanks.


Sunday, October 24, 2010
Differential Breather Extending
Huh?
You know when you're sitting at a light and underneath the car/truck/van in front of you, you see that circular thing in the middle? That's the differential. To those of you not in the know, your differentials have to breath. It's good that they breath. They get cold and they can suck air in. They got hot and they can let air out. If they didn't have a breather, they would blow the oil inside past seals and eventually leak... That would be bad.

The normal differential breather on most vehicles is up to this task. But what happens when you go off-road and cross a stream; your differential, while underwater, needs to breath to compensate for the contraction that all things experience when they get cold? Guys you know what I'm talking about... Well, it's underwater, it's not going to breath air and that's bad. Inside the differential is oil and oil and water don't mix well, do they? What to do? What to do?
How To Extend Your Tundra's Rear Differential
1. Go to you local Toyota dealership and purchase part# 90404-51319 Union

If you're lucky you'll have someone like Ricardo here who'll give you a discount in exchange for taking a picture of him for your blog! If you're unlucky, you'll get the guy in the back.
2. Go pickup about 15' of 3/8" fuel/air line. You probably won't need quite that much but extra is always better than not enough.
3. While you're getting the fuel/air line, pick up a bunch of HEAVY DUTY zip ties.
4. Park your truck in the driveway set the emergency brake, chock the tire (safety first! you'll be under that thing!).
5. Run inside to your PC, open your browser go to this blog, print this article and take back outside for reference.
OK, on to the real meat of the thing...
6. You'll need some tools to do this job.

At a minimum you'll need: 12mm and 14mm wrenches, CR-VT-30 torx (I really don't know what that means, but it's the thing that lets you remove the tail light housing, just look at it and find the one that fits), scissors to cut tubing, the aforementioned zip ties, and being an old punk-rocker/skater I enlisted the help of my old friend... duct tape. Man, I love that stuff! Got all your stuff? Let's continue.
7. Open up your truck tailgate, and look on the now exposed vertical plane to your left.

Ok, you see the two torx bolts? I know there's four, but we're not going to mess with the two holding the metal latch for the tailgate, ok? You want to take out the top and bottom ones. Once you do that...
8. You should be able to gently slide the tail light assembly out and let it hang down.

Inside, you'll see the strut that makes lowering and raising the tailgate that much easier, you lucky Tundra owner you. I chose to extend my differential to this point mostly because of other articles by much better people than myself. Now to the underworld...
9. Grab your 14mm and 12mm wrenches, your newly purchased union, your zip ties, your print out of this blog, and if you're an old punk rocker/skater your duct tape, and climb under the back of the truck.
10. The doohickey you're looking for will be on top of the differential about eight inches off-center favoring the driver's side. Take you 14mm wrench and remove this. If you're lucky, you won't hear, ppppssssssssssssssssssssssssssssssssssssssssssssssssssssssssssssssssssssssssssssssssssssssssssssssssssssssssssss, as you remove it, like I did. If you do, this means your breather wasn't working and your differential had built up pressure. Good thing you're doing this mod, huh?
11. After you remove the old breather, take your newly purchase union, your 12mm wrench and install the union. Careful to not cross-thread!!! After you're done it should resemble this:

12. Okay the rest from here is highly up to your interpretation of what works best. I'll show some pics of how I routed mine, but get creative and make this your own routing of the 3/8" line up to the tailgate strut area. 1st Hint: poke the hose through the tail light area down, feeding roughly enough to route to the differential. This is easier than going from bottom-up. 2nd Hint: If you are going to install a lift later, leave enough slack to compensate for the amount of lift desired.


As you can see, this is where the zip ties come in handy. Let's move out to the tail light area where you have routed your hose.
12. After the lengthy 11., you'll find yourself back in the sunlight, staring at the tailgate strut and all the excess hose leftover. What I did at this point, was route the tubing up the side and over the top of the strut, secure it with zip ties and duct tape (that stuff ROCKS!!!), install a breather on the end (not pictured)...

13. Take your torx thingie and put your tail light housing back on and you're ready to fearlessly cross streams, rivers, lakes or, if you live in Houston, our streets after a heavy rain, without the fear of contaminating the oil in your rear differential. Thanks for reading.
HEY!!! WAIT!!! I have a 4WD Tundra! What about the front differential? THIS IS NOT CONFIRMED: I talked to several Toyota technicians and I was told that the transmission, transfer case and front differential were ALL extended into the engine bay by the front strut/motor-mount area on the passenger's side. If this is the case great, I couldn't find it. I have looked at some exploded parts diagrams for the 2010 4.6l Tundra's drive train, and it does show unions and breather hoses for these parts. I did not look for the 5.7l so you guys will have to do some digging on your own.
Good luck and good night.
Here we go...
Ok, I know it's been a while but I have been busy, as you will soon see. I have accumulated the items needed to wire in an auxiliary fuse block, but still need to install. Things that have been done: Extended the rear differential breather, added a Yakima MegaWarrior basket with the extension to the cross bars previously installed on the cab, removed the Yakima MegaWarrior basket with the extension from the cab of the truck, installed additional Yakima cross bars over the bed of the truck, removed the extension from the Yakima MegaWarrior basket and then placed it on the newly installed Yakima crossbars, added two bike carriers outboard of the Yakima MegaWarrior basket and called it a week. Yakima should pay me for all the free adverts!!! I'll go into details in a few...
Monday, October 18, 2010
MIA
Ok, I'm apologize for being non tendo for so long. I have been real busy with work and kids. I have managed to do some work on Moby here and there. Full write-ups coming soon with pics! Thanks for following along.
Monday, July 26, 2010
All Work And No Play...
Okay. I did not work on the second coat for the wheels this weekend. I also did not start the mod that I have all the parts for (that's for later). I took a break this weekend and went fishing with my partners-in-crime, Craig and Robert. The day started early.
 By the time you see above, I was already dressed and had the truck loaded with my fishing gear, Coast Guard type stuff for three grown men, the boat all hooked up and the Igloo/live-well loaded in the boat.


(Sorry for dark images but as I said, it was real early)
The plan was for Robert to meet me at my house: check. Get on the road at 5:30ish: check. Go straight to Craig's house: not quite a check. During the "Go straight to Craig's house" portion of the trip, I happened to look out my side window and notice an Igloo/live-well on the side of the freeway overpass that looked suspiciously familiar. Moby having the convenient roll-down rear window that he does, I rolled it down and asked Robert to look and see if he could see the Igloo/live-well in the boat still. He did not. I pulled over to the side of the freeway (hazards a blazin', safety first) and double-checked. Sure enough, no Igloo/live-well. Hmph. Well, we had to go back. I couldn't leave it there. So, we made our u-turns, got back to the overpass, pulled over (hazards a blazin' a second time) and found the flying Igloo/live-well laying there undamaged except for one broken latch! (Igloo's are made in Texas by the way, just like Moby!) I put it in Moby's back seat this time.
We did manage to pick up Craig eventually.Then we headed to BJ's Marina to launch the boat. This is a small little boat ramp on the east fork of the San Jacinto River. Supposedly, there are 40lb catfish here just waiting for you to drive by in your boat and jump in. Not the case. The entire trip yielded; 1 White Bass (just legal), 2 Catfish (too small to keep), good times with good friends, and 1 Hank III convert (I promise to make that CD Robert!). All-in-all a good trip. The east fork is supposed to have excellent Crappie fishing. I don't think I would recommend it for catfish though.
Launching at BJ's Marina

Craig and Robert: Craig has this amazing ninja casting ability!

Enjoying some of the river scenery since no fish were biting.

More scenery


Robert waiting on that catfish to "jump in"

Thanks for checking this out. Coming up: Igloo/live-well build (kind of backwards since I've already chronicled it's near death experience) and Moby's rear axle gets a snorkel of sorts. Stay tuned.
Sunday, July 18, 2010
New Shoes for Moby... Sort Of.
Moby Dick was a great white whale. My Moby is a great silver Tundra. Very silver, even the wheels.

I like the look of the Tundras rolling around town on the black Rock Stars and similarly styled wheels but: 1. I am not too inclined to pay $1200.00 (and that's on the very cheap side) for a set of wheels for a truck I'm still making payments on. 2. I like the fact that the stock wheels keep all debris thrown from the tires inside the wheel well. So....
Write-Up On Painting Your Wheels Black: The Good, The Bad & The Ugly
Okay, you may be asking why does an "Expedition Tundra" need black wheels. Good question. Well, uh, you see, hmmmm, black wheels... they... uhhhhhhh... OH! The black color of the wheels absorbs heat, transfers this to the air inside the tire which expands it. Helps keep your tires properly inflated... yeah. Truth is there is no legit reason. One benefit of this, mod, if you will, is that if the wheels get cosmetic trail damage, it's very easy to touch them up. So here we go.
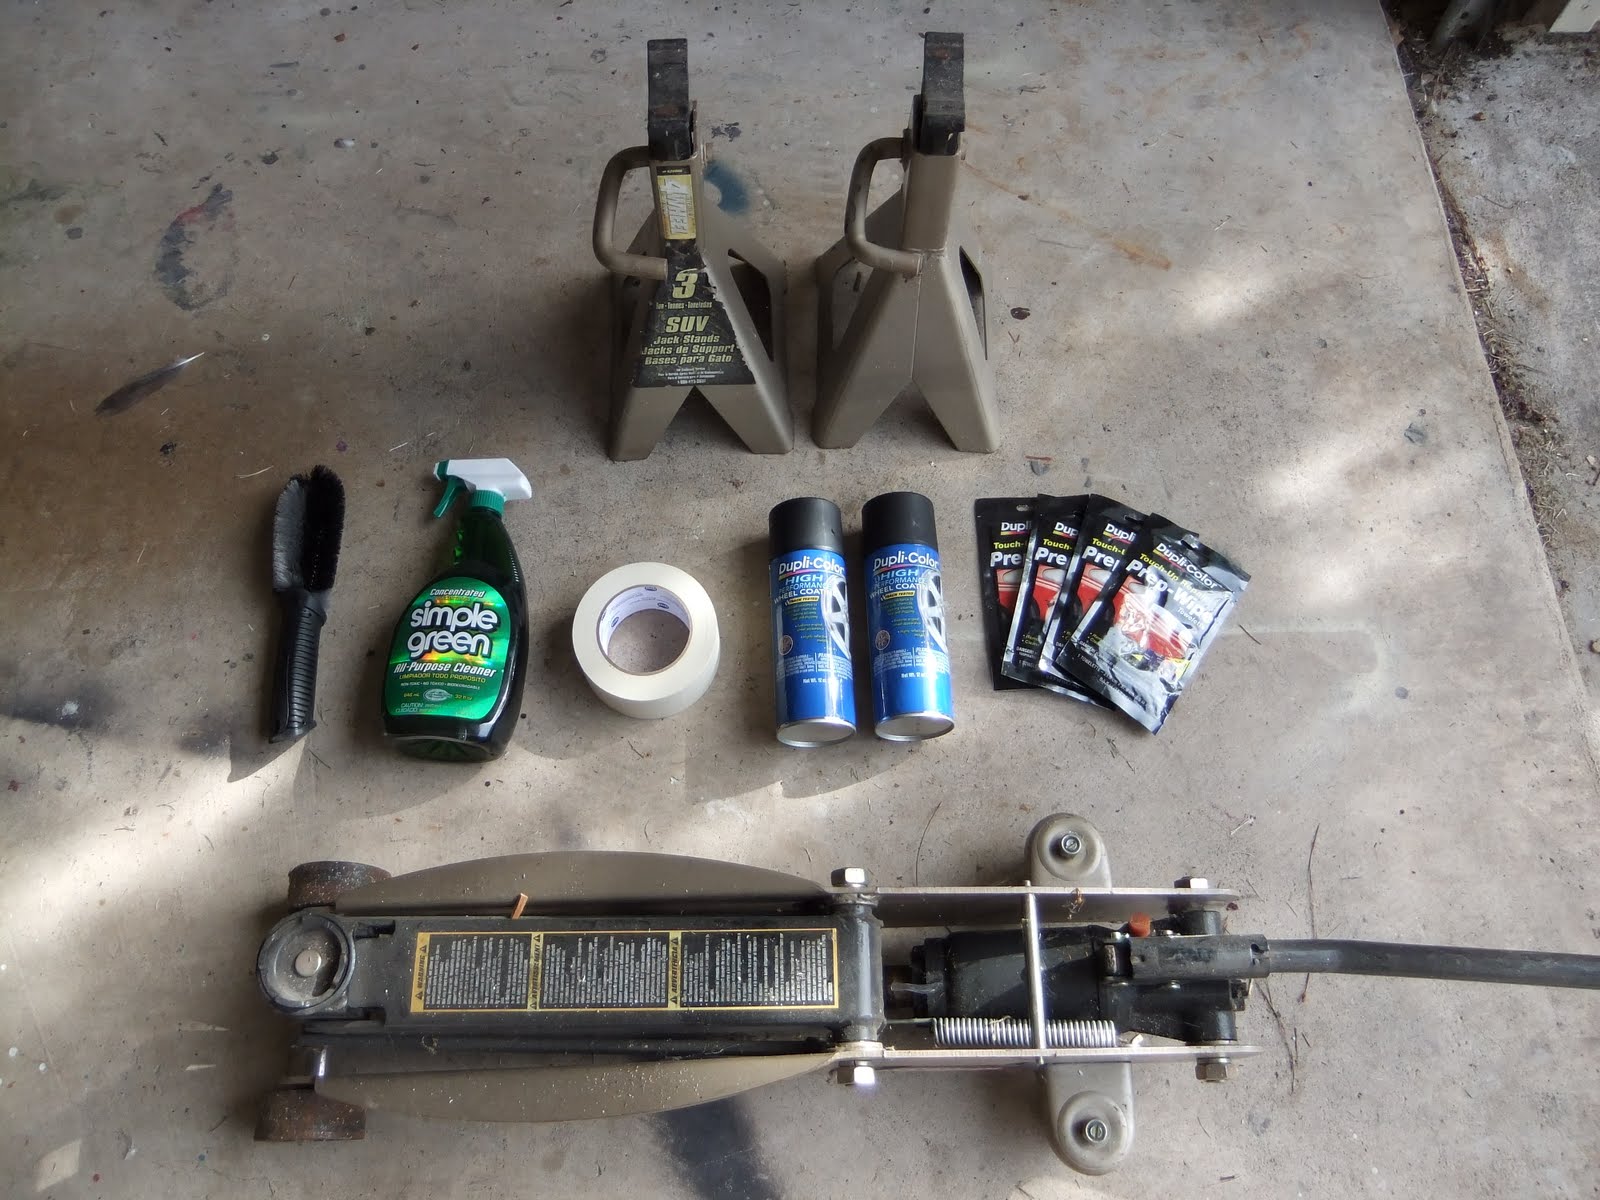
Items used for the painting of the stock Tundra 20" wheels.

For the paint, I chose Dupli-Color Wheel Paint (black, of course).

Beverage for the job:
 Yep, a Texas beer to go with the Texas heat and humidity.
It was very hot when I started around 5:00pm, low 90's. Humidity was VERY high. The paint instructions called for not painting above a 60% humidity level. If that's true, I don't know why they even sell this paint on the Gulf Coast! Hoping I wasn't too far out of the workable humidity range, I got to work:
1. I took my trusty "Petersen's 4Wheel&Off-Road" jack to the frame rail on Moby.
 After lifting Moby up high enough, I place my "Petersen's 4Wheel&Off-Road" jack stand under both sides at the front and removed the wheels.
 Even though I was using my limited edition Petersen's 4Wheel&Off-Road jack and jack-stands... all that was pretty hard work. Time for "beverage of choice"...
 Okay, whew! It's HOT!!!
After I had the front wheels off, I had to wash the road grime off the wheels. I can tell you the combination of Simple Green and the wife's toilet brushes are very effective for this job.

I tell you what, scrubbing those front wheels was a lot of work. Time for...
Okay, after the wheels are cleaned, you have to rough up the existing paint on your wheels with 320grit sandpaper. I won't lie. I sat there for a few minutes, smoking, staring at the wheel at this step. Once sandpaper hits the paint on the wheel, you are at the point of no return. I started sanding...
 AAAAGGGGGGGHHHHHHHHHH!!!!!!!!!!!!!!!!!!!!!
Each time I moved the sandpaper back and forth, making that sandpaper-y sound, it sounded like this, "YOU'RE-KKSSSSHHHHH-SCREWED". Sigh, no turning back now. It's very upsetting ruining a perfectly good set of wheels, better get a...
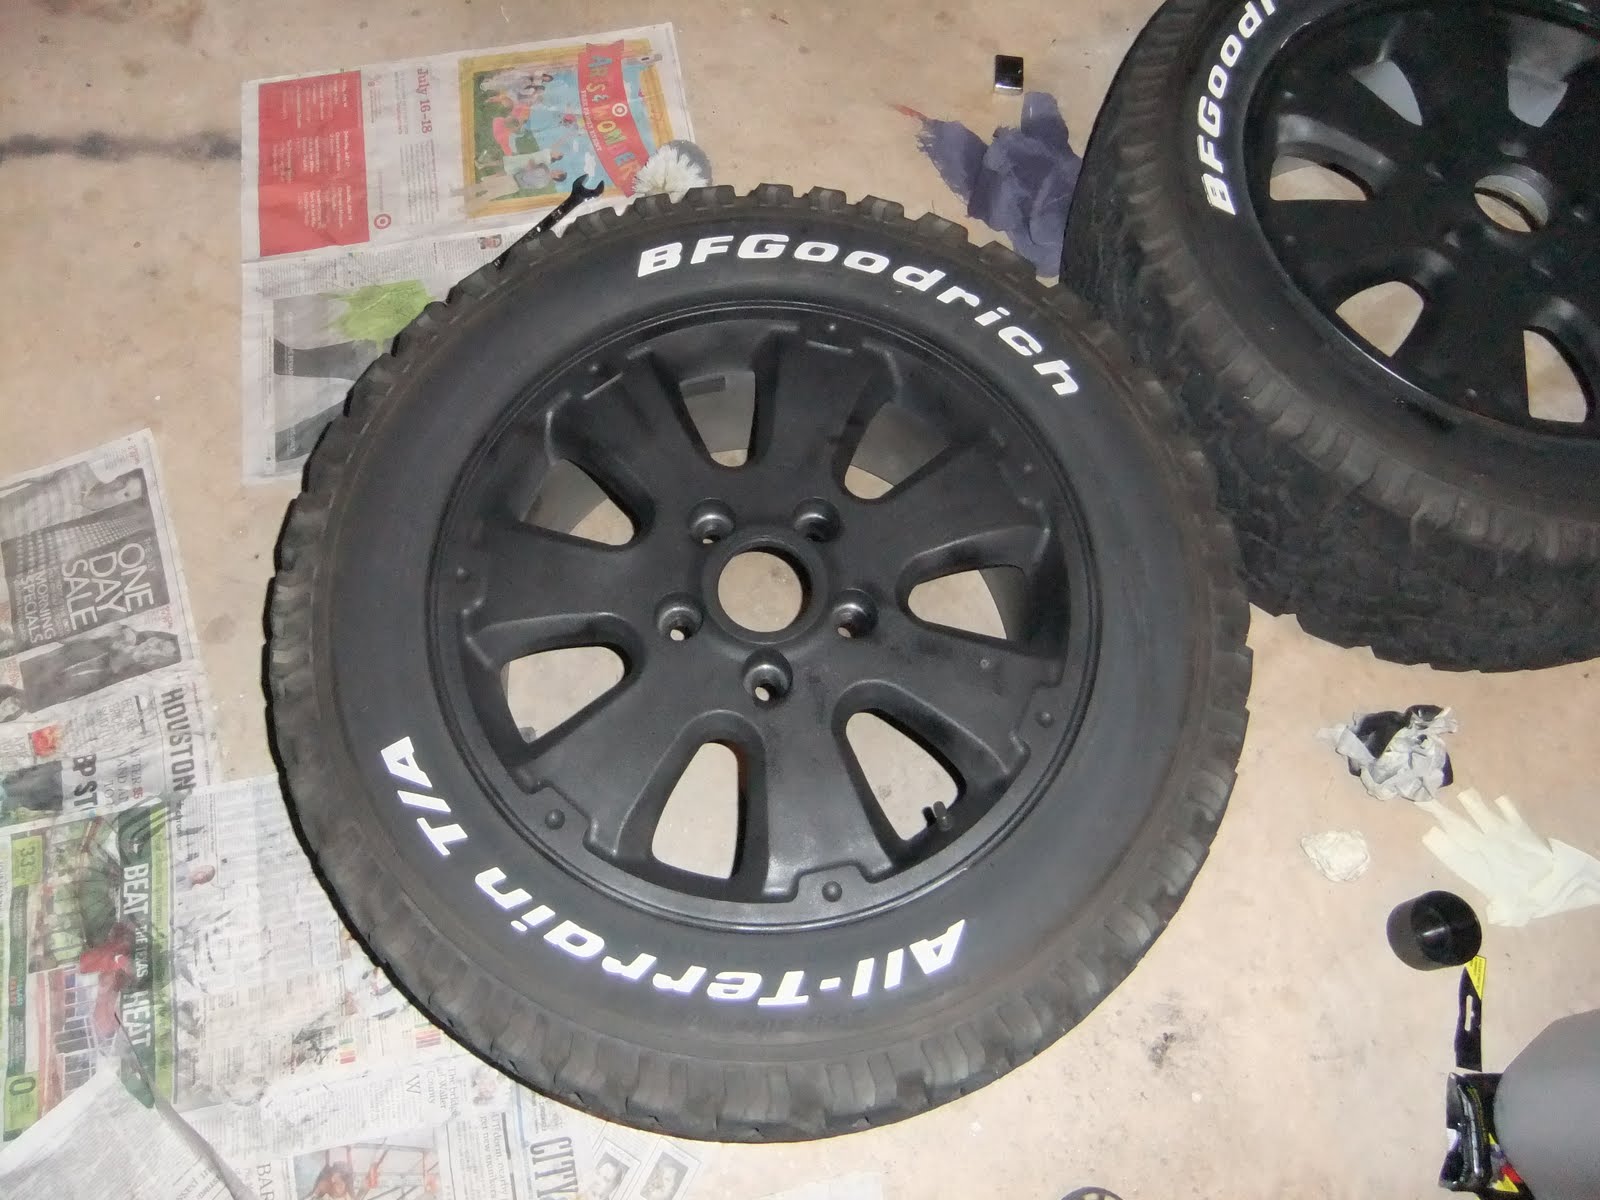
Okay, tires cleaned and sanded. After a quick spray to get sanded particles off, I used a Dupli-Color prep wipe then, dried the wheels. Now I'm no professional (obvious), so I did not remove the tires from the wheels. I did not want to spray paint the tires though. On a Mustang forum, there was this one guy who, ingeniously, made use of index cards to create a barrier between the wheel and the tire. I was concerned about over spray. I masked off the tires with masking tape first, overlaying the tape onto the wheel. Then I went back and using a razor, circled the outside of the rim, between the bead protector on the tire and the very edge of the rim.

Once that was completed, I placed newspaper over the rest of the tire.
 I revised this process to be much faster by the time I got to the last wheel, but you get the idea. I mentioned earlier that I dried the wheels, but from my previous experience with spray painting my jon boat, I knew water lurked everywhere waiting to mess up the whole painting affair. I put a fan on the tires to help rid the remaining water. While I waited...
Oh, I also shook up the paint cans...

The instructions called for one light coat, wait ten minutes, apply another light coat, wait ten minutes and then apply a medium wet third coat. That's pretty much what I did. So the process went into the night times four. Here are some wheels with the paint drying...

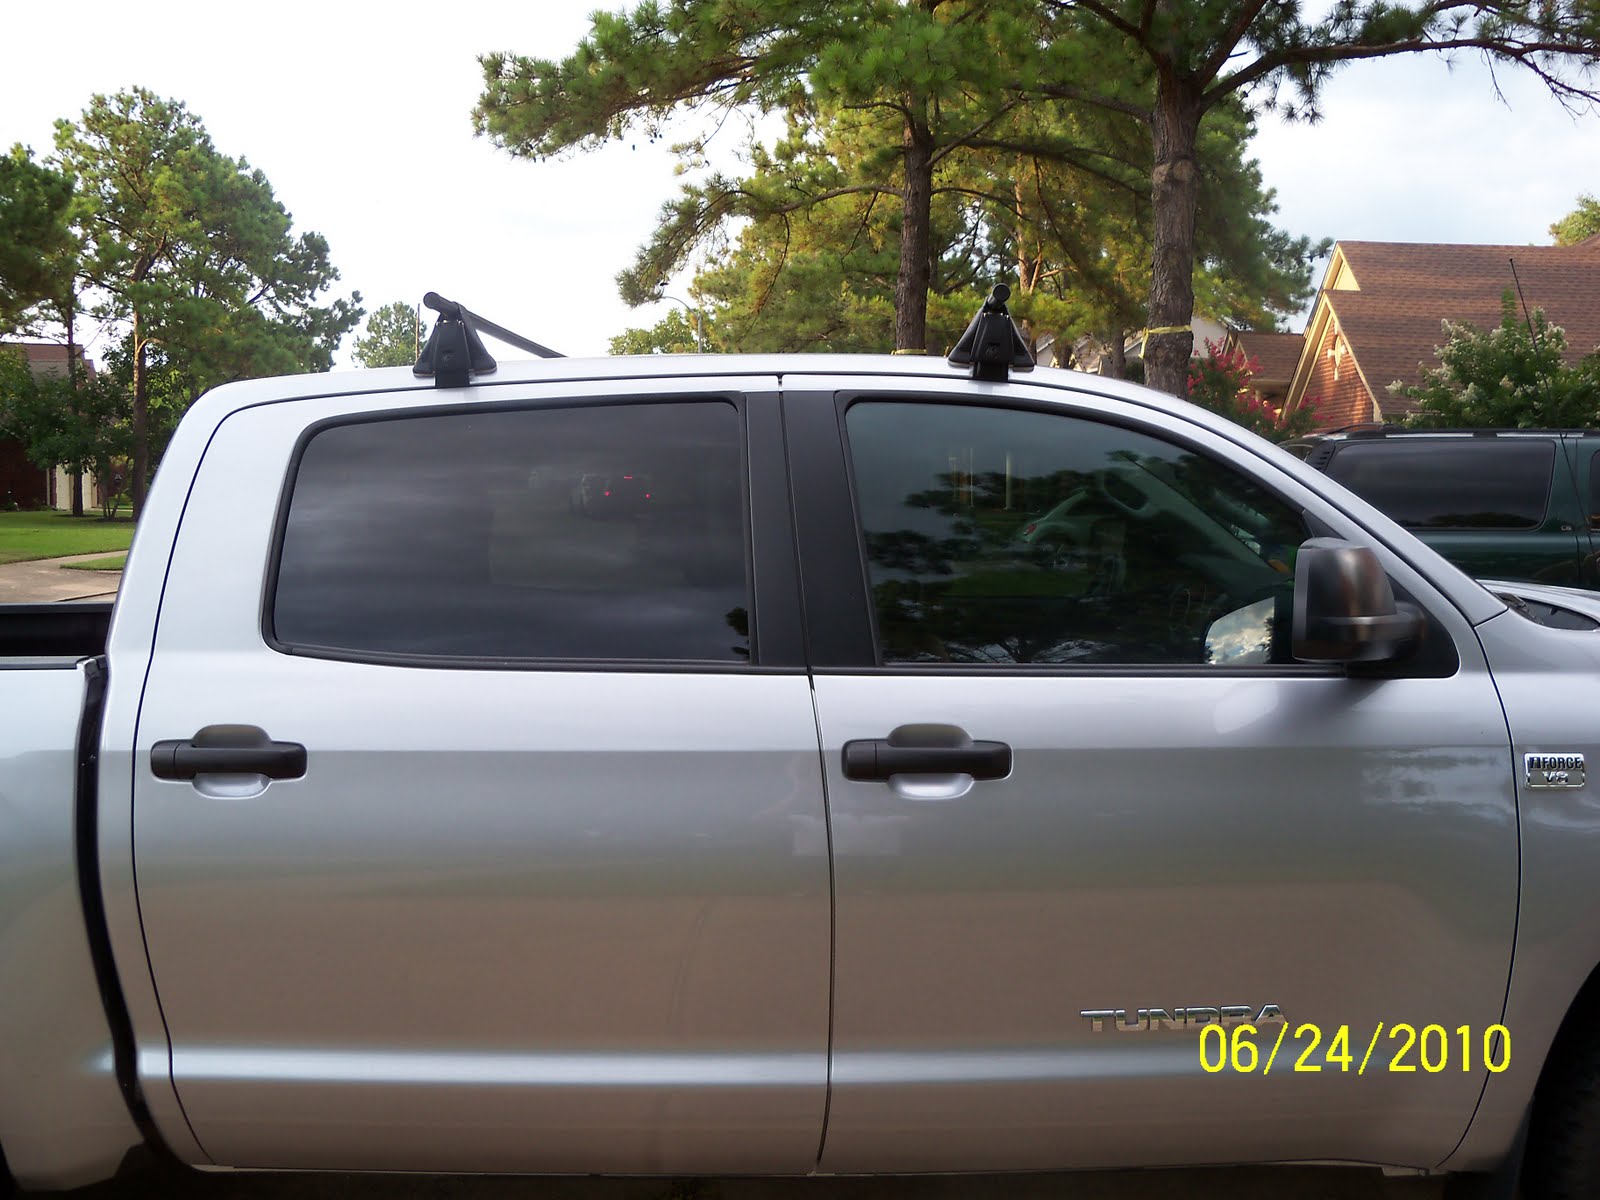
Once I was finished painting the wheels and had them back on, this is what the truck looked like...

and this is what I looked like...


I like the look of the Tundras rolling around town on the black Rock Stars and similarly styled wheels but: 1. I am not too inclined to pay $1200.00 (and that's on the very cheap side) for a set of wheels for a truck I'm still making payments on. 2. I like the fact that the stock wheels keep all debris thrown from the tires inside the wheel well. So....
Write-Up On Painting Your Wheels Black: The Good, The Bad & The Ugly
Okay, you may be asking why does an "Expedition Tundra" need black wheels. Good question. Well, uh, you see, hmmmm, black wheels... they... uhhhhhhh... OH! The black color of the wheels absorbs heat, transfers this to the air inside the tire which expands it. Helps keep your tires properly inflated... yeah. Truth is there is no legit reason. One benefit of this, mod, if you will, is that if the wheels get cosmetic trail damage, it's very easy to touch them up. So here we go.
Items used for the painting of the stock Tundra 20" wheels.
For the paint, I chose Dupli-Color Wheel Paint (black, of course).

Beverage for the job:

It was very hot when I started around 5:00pm, low 90's. Humidity was VERY high. The paint instructions called for not painting above a 60% humidity level. If that's true, I don't know why they even sell this paint on the Gulf Coast! Hoping I wasn't too far out of the workable humidity range, I got to work:
1. I took my trusty "Petersen's 4Wheel&Off-Road" jack to the frame rail on Moby.


After I had the front wheels off, I had to wash the road grime off the wheels. I can tell you the combination of Simple Green and the wife's toilet brushes are very effective for this job.

I tell you what, scrubbing those front wheels was a lot of work. Time for...

Each time I moved the sandpaper back and forth, making that sandpaper-y sound, it sounded like this, "YOU'RE-KKSSSSHHHHH-SCREWED". Sigh, no turning back now. It's very upsetting ruining a perfectly good set of wheels, better get a...
Okay, tires cleaned and sanded. After a quick spray to get sanded particles off, I used a Dupli-Color prep wipe then, dried the wheels. Now I'm no professional (obvious), so I did not remove the tires from the wheels. I did not want to spray paint the tires though. On a Mustang forum, there was this one guy who, ingeniously, made use of index cards to create a barrier between the wheel and the tire. I was concerned about over spray. I masked off the tires with masking tape first, overlaying the tape onto the wheel. Then I went back and using a razor, circled the outside of the rim, between the bead protector on the tire and the very edge of the rim.

Once that was completed, I placed newspaper over the rest of the tire.

Oh, I also shook up the paint cans...

The instructions called for one light coat, wait ten minutes, apply another light coat, wait ten minutes and then apply a medium wet third coat. That's pretty much what I did. So the process went into the night times four. Here are some wheels with the paint drying...
Once I was finished painting the wheels and had them back on, this is what the truck looked like...

and this is what I looked like...

General impressions: if you have the money, pay someone to do this. I was not real happy with the outcome. The coverage is spotty, you get splatter, and it's going to look like a spray painted wheel no matter what. Now, as mentioned earlier, I have a lot of experience with spray paint after painting my jon boat. I will go back and do a second coat after this paint has cured and some sanding. That made a big difference with the boat. I will tell you that after this experience I, in my conspiracy mode mind, believe that all the videos on Youtube that show this process and the great results are all put out by the evil spray paint industry. If you choose to do this yourself, some tips:
1. Buy your paint at least two weeks in advance. I had to go to six different parts stores to find TWO cans of black from Dupli-Color.
2. Start early in the day. The work involved removing the wheels, cleaning, sanding, prepping, masking, painting, drying, painting again, drying again, painting the third time, letting dry enough to put back on vehicle all take a huge amount of time.
3. Most forums tell you that one can will do all four wheels... if you drive a Mini! I bought two cans to be safe. Knowing what I know now, I would've bought six (see next).
4. Buy extra cans. One of the cans that I bought splattered. I cleaned it, cursed at it, offered it my beverage of choice if it would stop. No dice. Had I extra paint at my disposal, I would've tossed this one immediately!
5. When you get down to about 2/3rds of a can, stop using it and switch to a fresh can. Trust me on this one.
Disclaimer: No beers were actually finished in the painting of the wheels or the typing of this post. For those of you that know me, you won't find this hard to believe; I went through 1.5gallons of sweet tea while doing all this, the beer sat in the corner, half-full.
Tuesday, July 13, 2010
Yakima Crossbar And Towers Install
After the trip to Austin, I have decided that more external storage on Moby would not be a bad thing. I have a Yakima Load Warrior basket on the Pathfinder. That thing has been a God-send on trips with the family. You get to throw all the, this could become a dangerous projectile, stuff on the roof.

On the Pathfinder, the basket was easy because of the factory roof rack. Moby... has no roof rack. Poor Moby. No problem. A quick trip to Yakima's web site, yielded all the necessary components to add a roof rack. The parts for a 2010 Toyota Tundra Crewmax are:
1. Q Towers - Part# 8000124

2. Q99 Clips (front and rear are the same for Moby) - Part#8000699

3. 66" Crossbars (58" are recommended) - Part# 8000410(66")

That's it. (Edit - Don't skimp like I did, go ahead and buy the fairing. Wind noise without it was unbearable!!! Once added... you have a rack up there, but can actually talk at freeway speeds.)
Installation is very simple with two people. I had the assistance of my teenage daughter and we managed okay. The instructions provided are very thorough and easy to understand. Most of your time will be spent double-checking measurements. Once installed, this setup provides a very stable base for all kinds of attachments. In Moby's case, it will be a Yakima MegaWarrior basket (thanks Chris), with extension. I plan on using the basket to mount: Hi-Lift Jack, 4 lights front, 2 lights rear, and possibly an awning. I had thought about using the basket to mount a spare tire, but it would be too much of a PITA to get it down, and take up too much cargo space.
If you have any questions regarding the install, feel free to contact me. I'll leave you with some pics of Moby with naked roof and the Moby after rack install:
Moby with naked roof:

Side view of naked roof:

Moby with nice rack (front):

Moby with nice rack (side):
Subscribe to:
Comments (Atom)